
In Final Fantasy VII Rebirth, the Absence of a Sign Quest has Cloud and Aerith tracking down photographs across Cosmo Canyon. This FF7 Rebirth Absence of a Sign guide will explain how to find to all photograph locations.
FF7 Rebirth Absence of a Sign photograph locations
You first unlock the Absence of a Sign quest in FF7 Rebirth after reaching Chapter 12: A Golden Key. Once you’ve progressed the story far enough, the new quest will be added to the Cosmo Canyon region and is activated by visiting the Planetology Assembly.
The quest works like this: you have to defeat Reapertail in Cosmo Canyon and snap three photographs of the Celestial Phenomena in the area. Sounds easy, right? Unfortunately, knowing where each photograph is located is only half the battle, as you need to know how to actually get to these locations. Below, we will break down the exact path you must take to reach each Celestial Phenomena.
FF7 Rebirth Celestial Phenomena photograph location 1
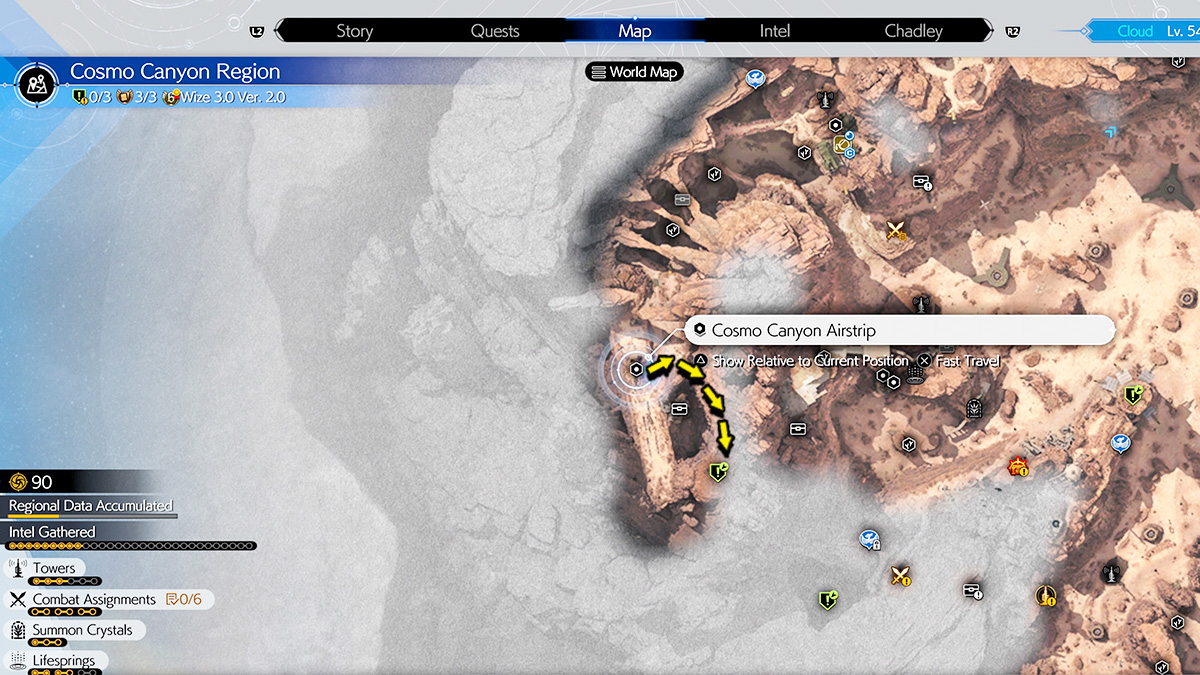
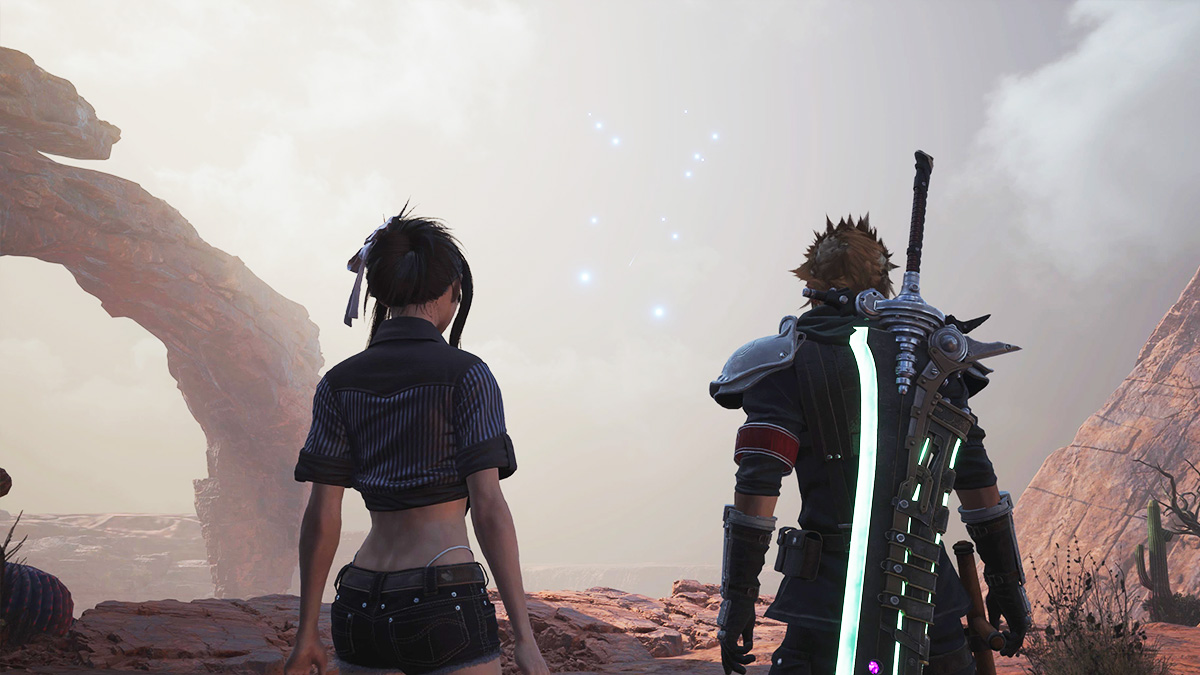
The first Celestial Phenomena in the FF7 Rebirth Absence of a Sign quest can be reached by warping to the Cosmo Canyon Airstrip. Once you’ve fast-traveled to the landing area, you want to take the mountain path left of the shack. It can be hard to see at first. For your convenience, we have provided an image below that shows the exact spot you need to go to:

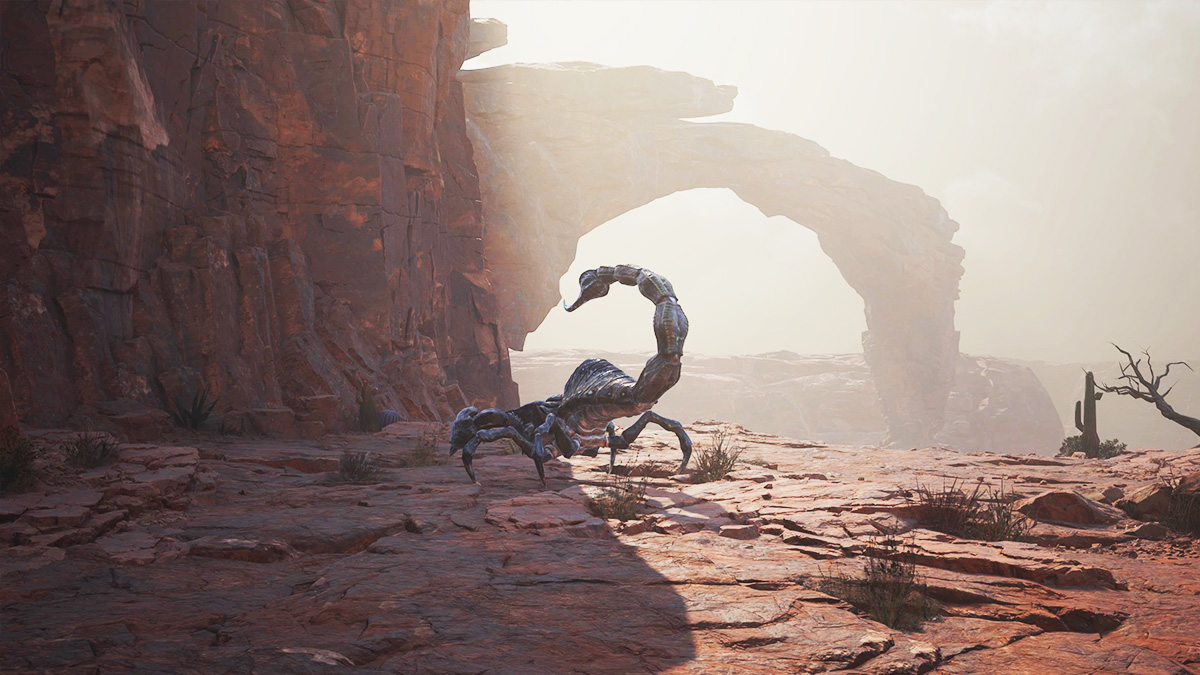
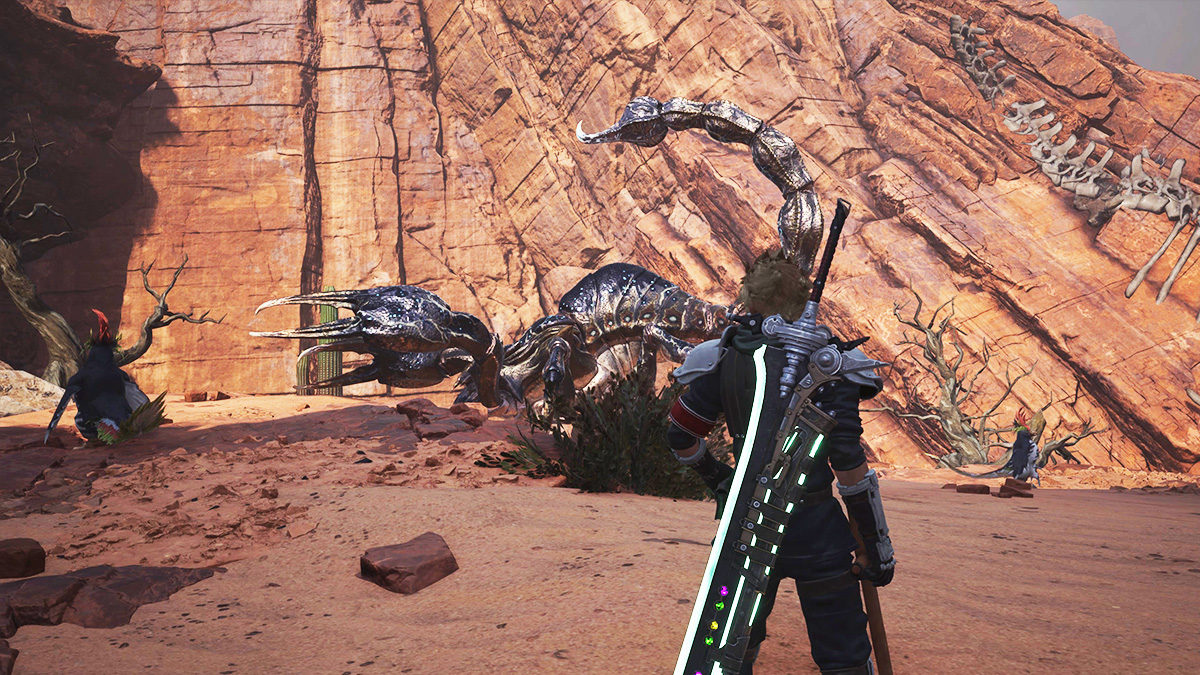
After taking the winding path up the side of the mountain, you will eventually counter a giant scorpion-like enemy called a Reapertail. Prepare for a tough fight, as the monster has quite a bit of HP. The Celestial Phenomena you need to photograph will appear after you kill the Reapertail.
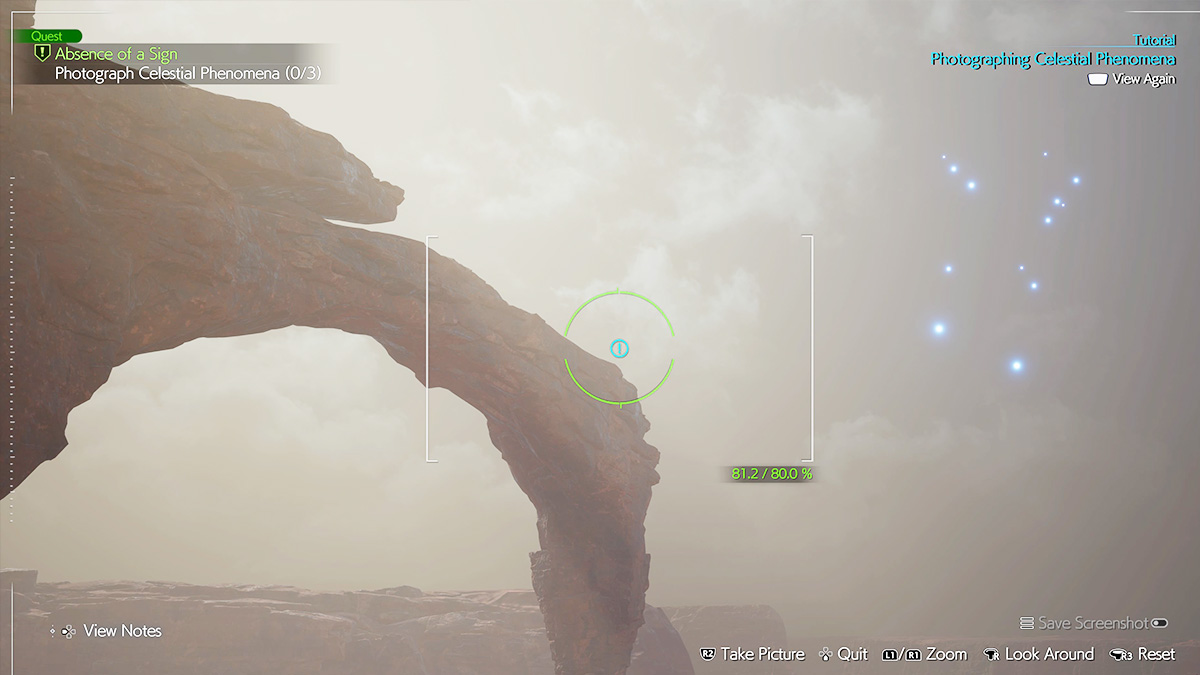
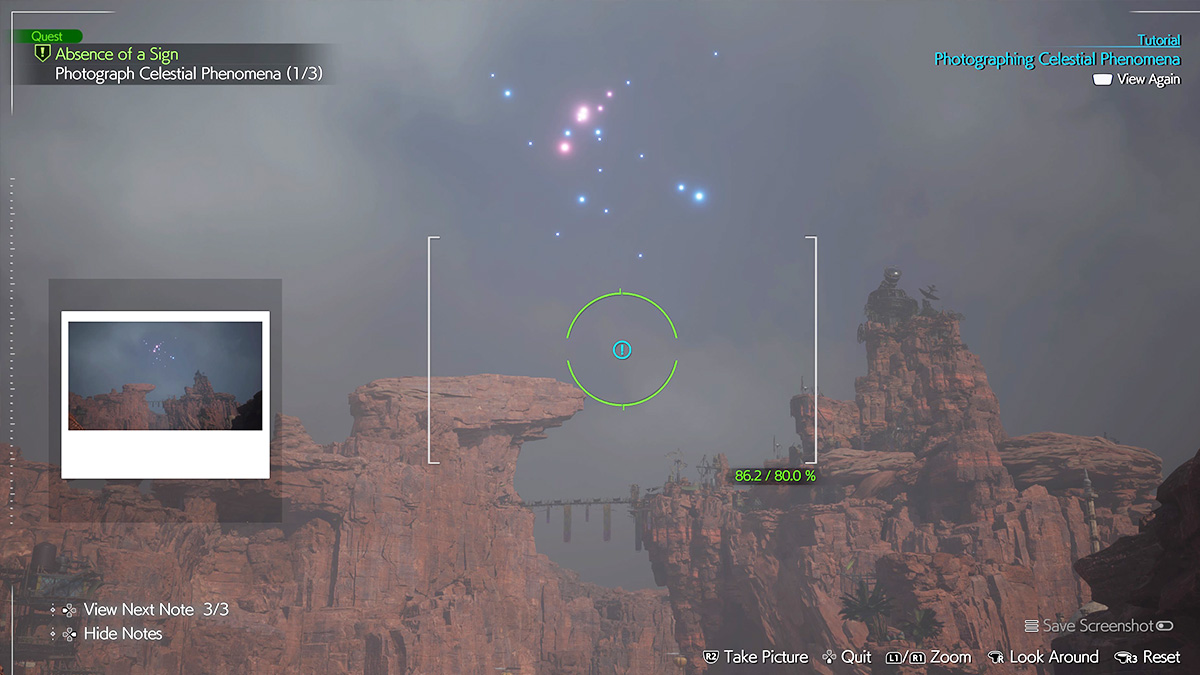
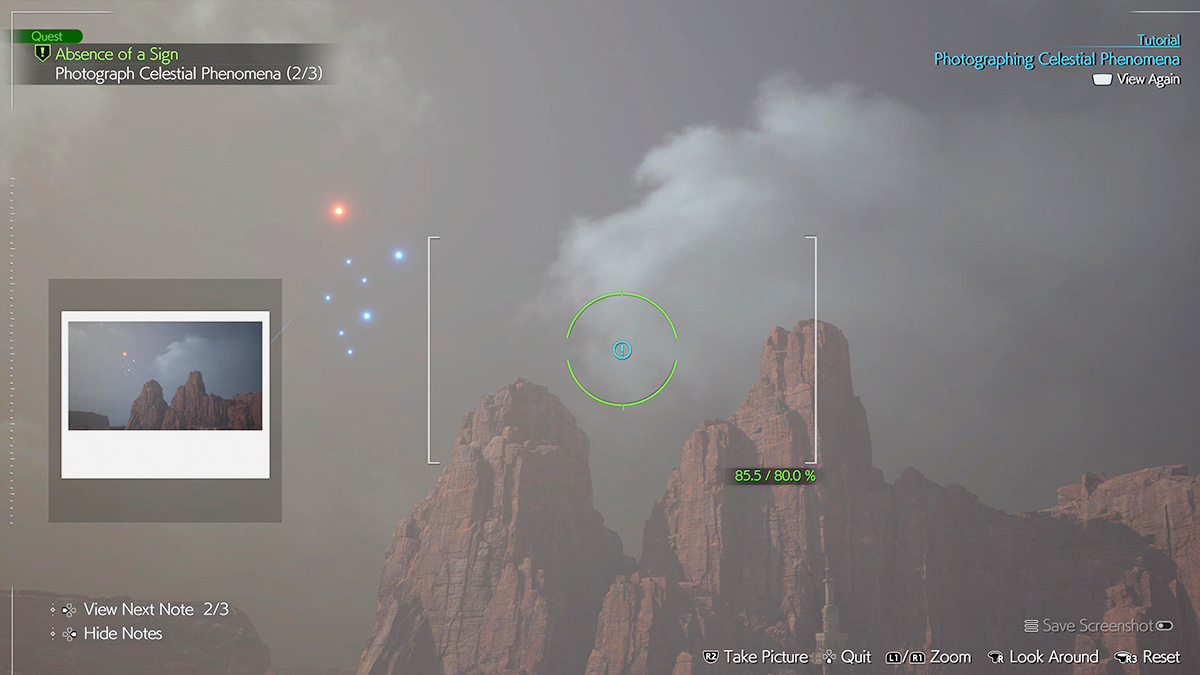
To take the Absence of a Sign Photograph 1, you must walk over where Aerith stands. Press “Up” on your D-Pad to pull your camera out. Aim the lens to the left so it’s focused on the rocky mountain archway. Keep moving the lens until the zoom turns green and says at least 80%. Press “R2” to snap the photo when it’s the right distance. You will know you’ve done this correctly because Aerith will say it’s a “perfect” shot.
FF7 Rebirth Celestial Phenomena photograph location 2
The quickest way to reach Celestial Phenomena 2 in the FF7 Rebirth Abscene of a Sign quest is to warp to the Phenomenon Intel 1: Planetological Ruins. If you haven’t unlocked this warp point yet, this map area can be reached on foot without needing to use the gliding Chocobo ramps.
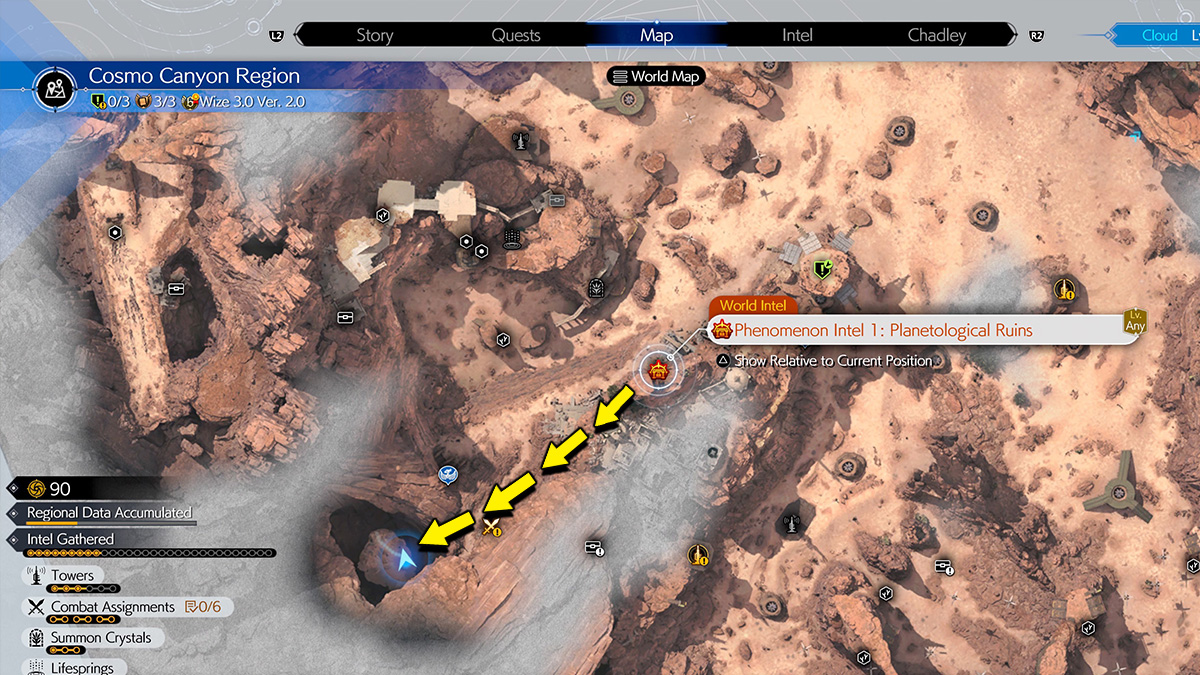
Once you arrive at the Planetological Ruins, run past the Intel spot and continue heading north. You will eventually see a giant mountain path with massive ruins on either side. For this first step, you want to travel up the winding path and head towards the mountains.
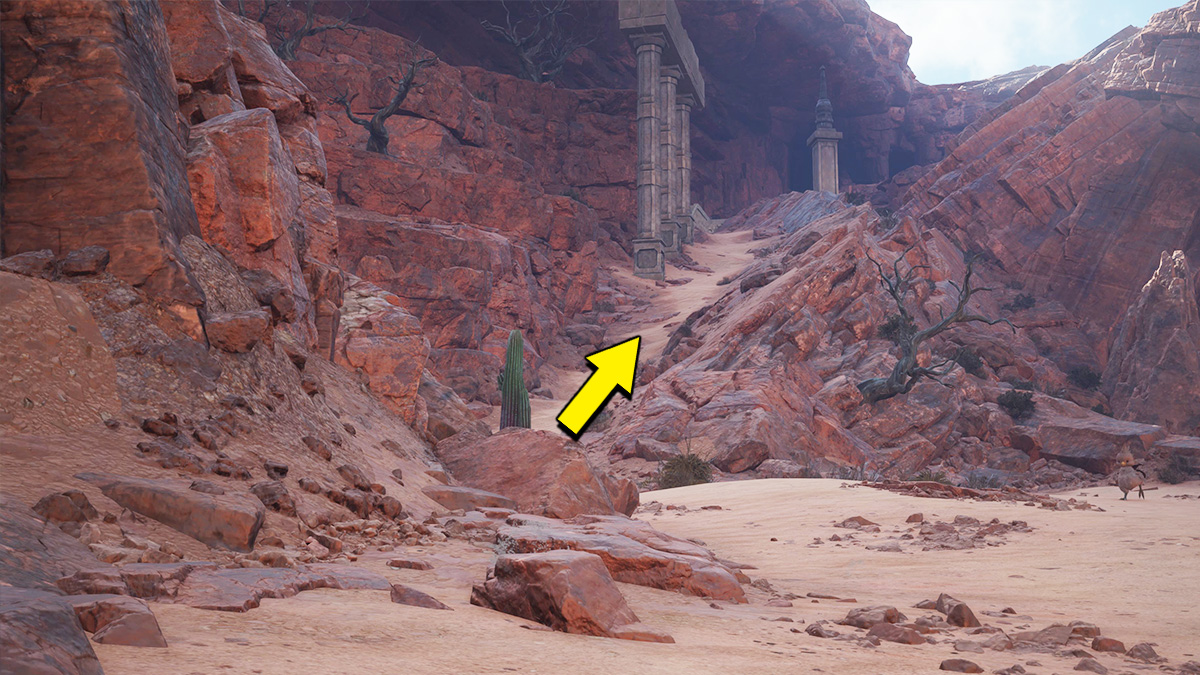
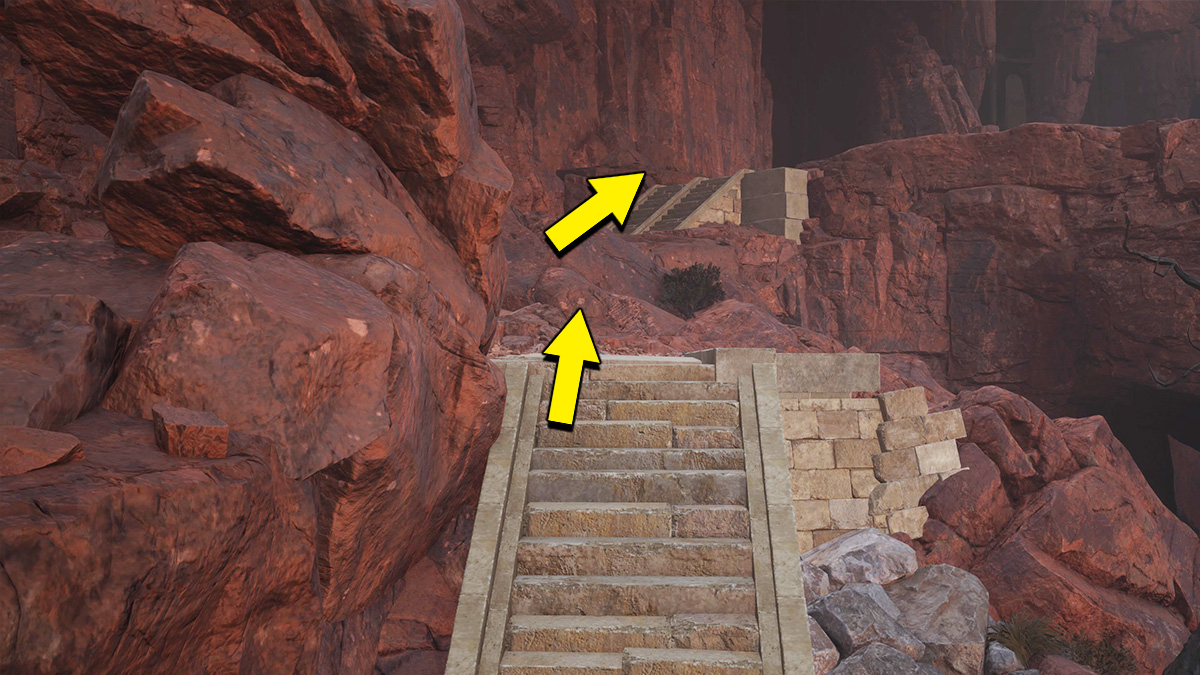
Walking up the path, you will see two sets of white stairs broken up between the rocks. Climb up each step and then take a right to reach the giant platform. Once you step on the platform, you will see another giant Reapertail. Like the first location, you will need to take out the creature before the Celestial Phenomena will appear in the sky.
For the Absence of a Sign Photograph 2, you must again walk over to where Aerith is standing. Press “Up” on your D-Pad to pull your camera out. Aim the camera’s lens so it’s hovering above the tip of the giant rock jutting out from the mountain on the left side of the canyon. Keep moving the lens until the zoom becomes green and reads at least 80%. When you have found the right distance, press “R2” on your controller to take the photo.
FF7 Rebirth Celestial Phenomena photograph location 3
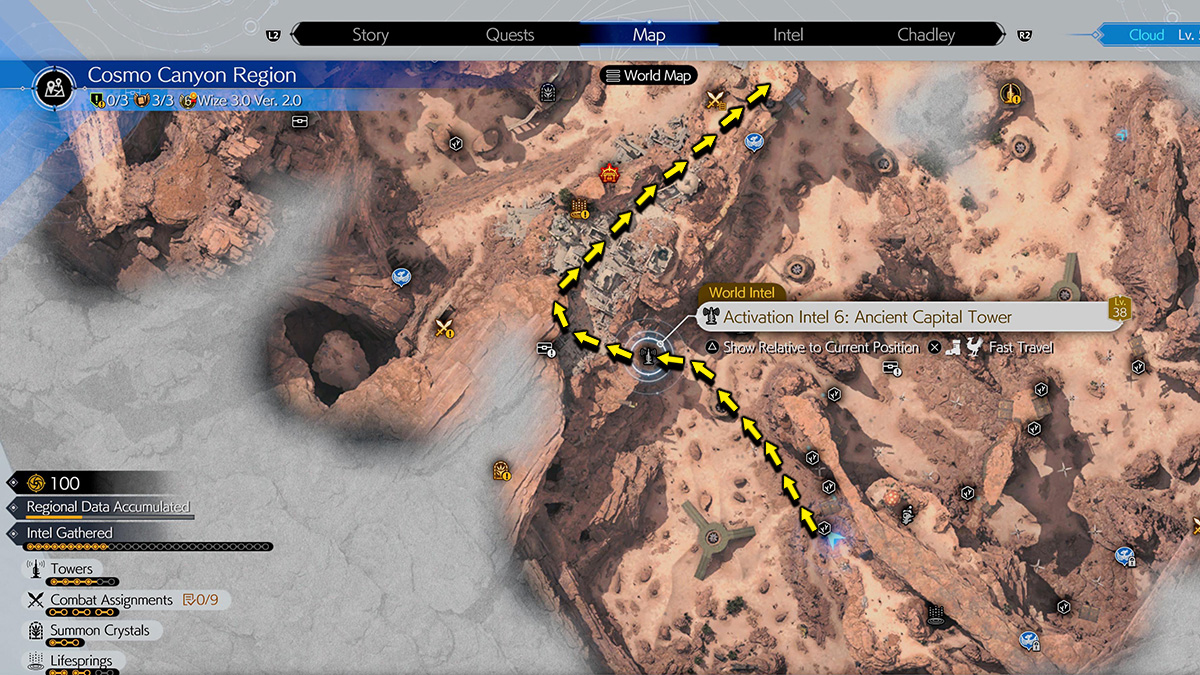
I’m not going to lie; finding the Celestial Phenomena 3 Photograph spot is really confusing. Because of this, it’s a bit difficult to explain without an actual video. The easiest way to reach the FF7 Rebirth Absence of a Sign photograph is to warp to the Activation Intel 6: Ancient Capital Tower fast travel point.
For your convenience, we have provided a map that shows the path you must take to find the Celestial Phenomena 3 photograph:
See? I told you it was confusing. The map above assumes you have unlocked Gliding Range No. 16-124m already. To reach this point, you actually have to take five separate Chocobo Gliding ramps in total. To make this a bit easier to understand, I’m going to provide you with a list of all the ramps you need to take and the order in which you must take them:
- Step 1: Gliding Range No. 6-61m.
- Step 2: Gliding Range No. 7-78m.
- Step 3: Gliding Range No. 13-88m.
- Step 4: Gliding Range No. 14-90m.
- Step 5: Gliding Range No. 16-124m.
- Step 6: Fly to the Activation Intel 6: Ancient Capital Tower.
Gliding Range No. 6-61m
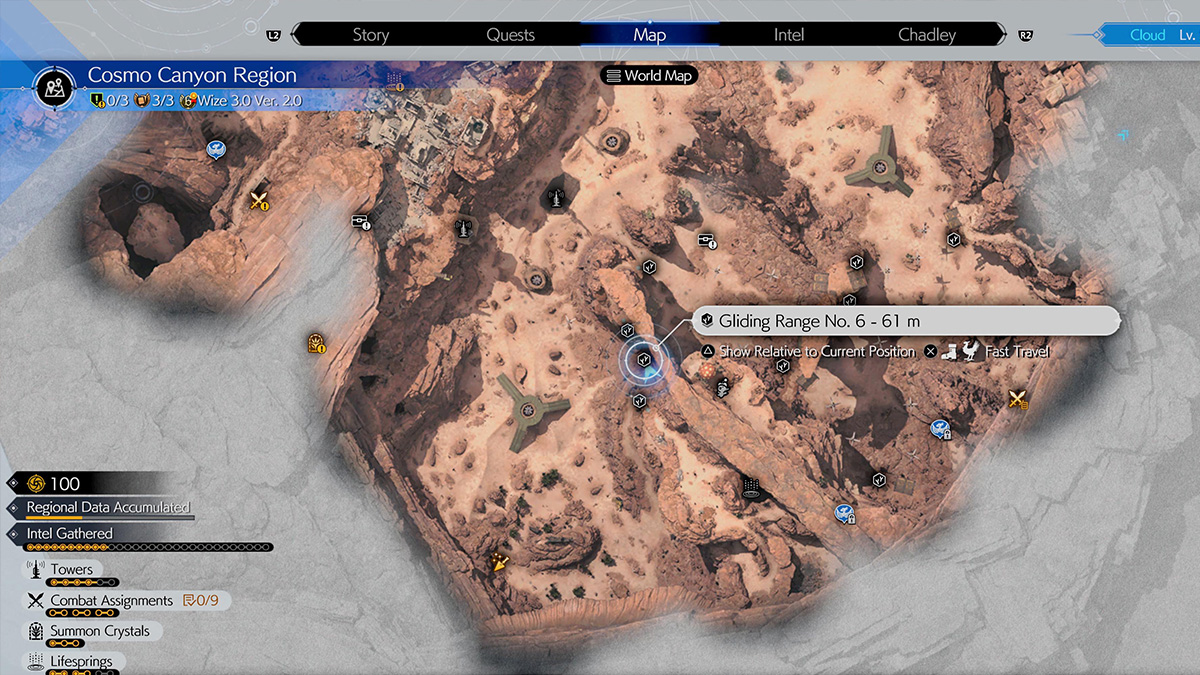
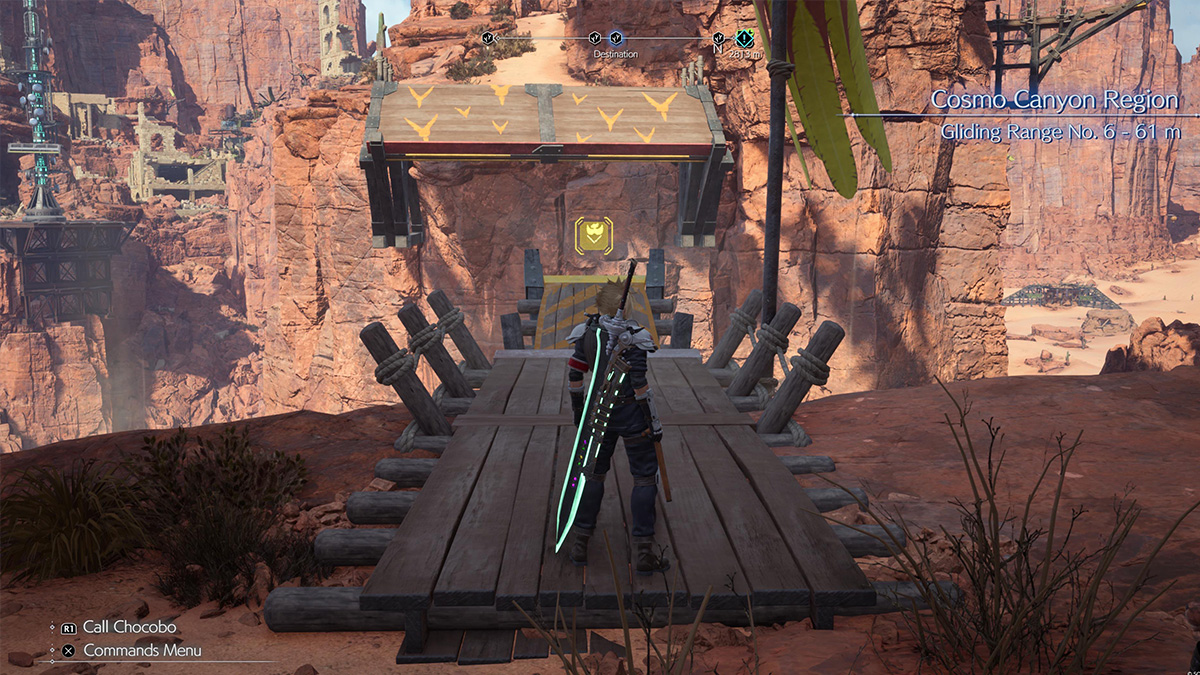
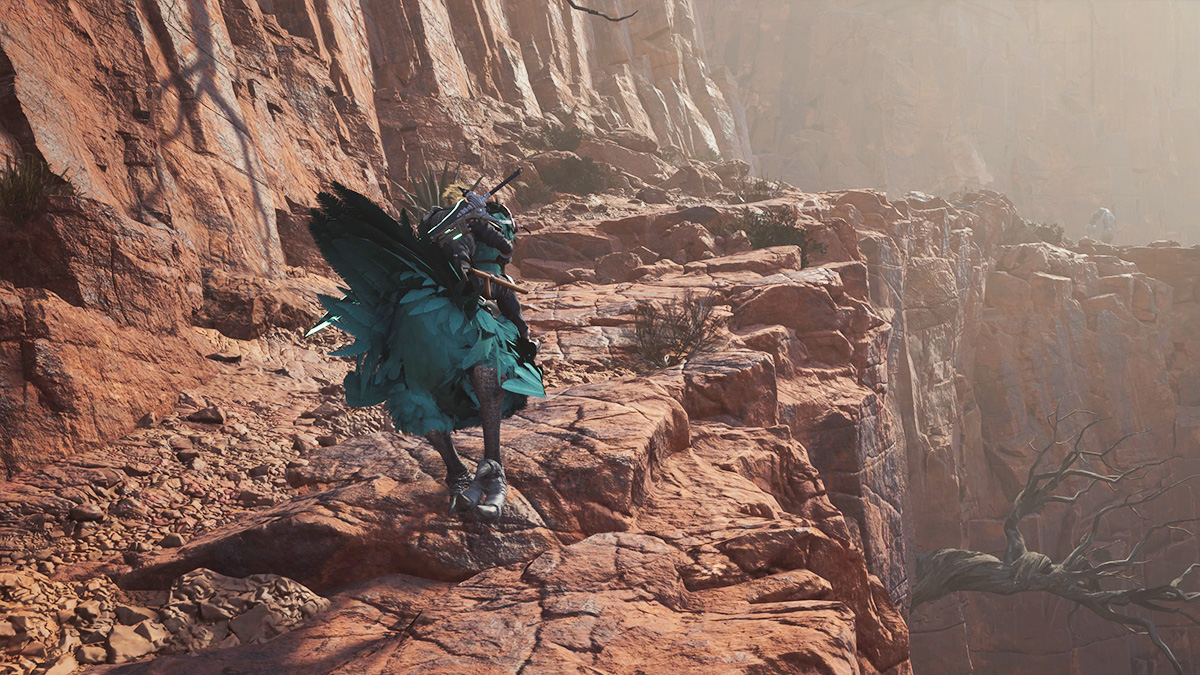
Use your Chocobo mount to run up the ramp and hold up on your joystick to glide across to the other side. After landing, take the winding path that wraps around the rocky mountain. You should eventually find Gliding Range No. 7-78m, which will send you across the entire canyon.
Gliding Range No. 7-78m
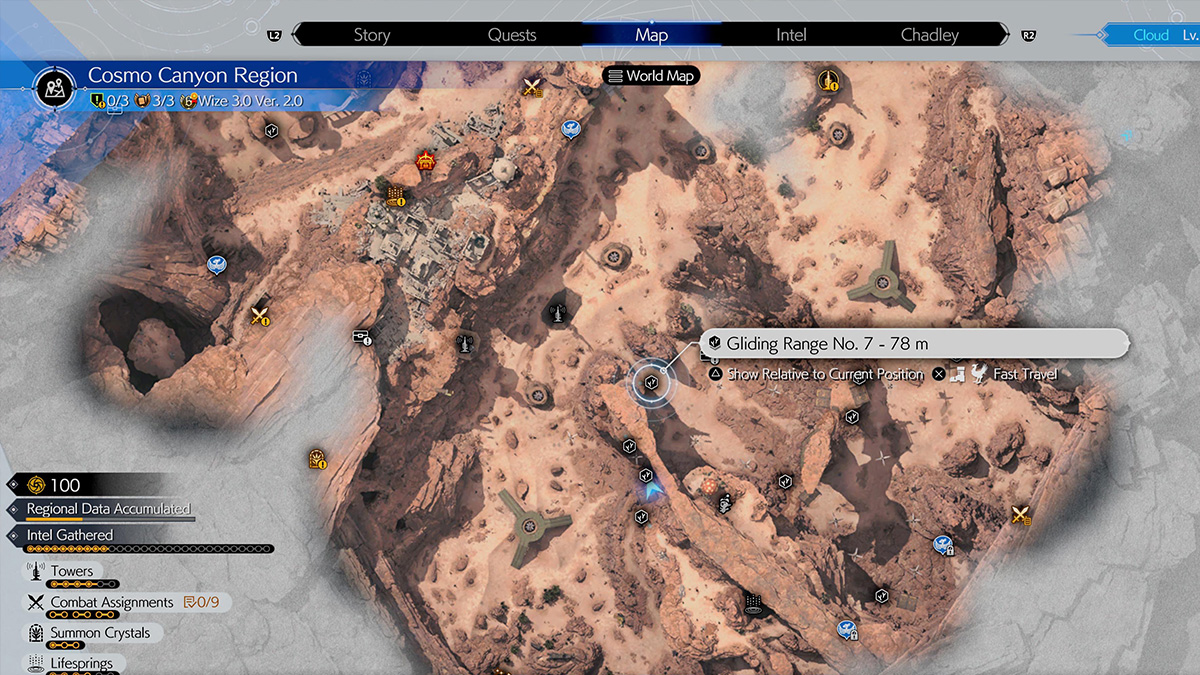
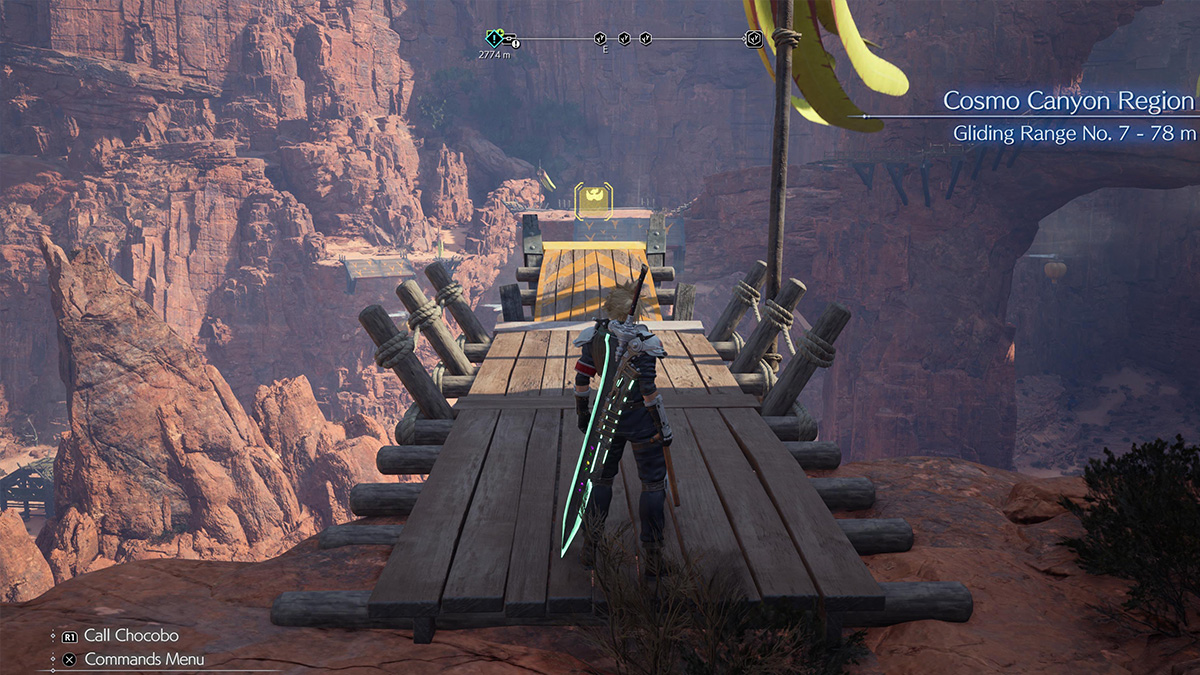
Run up Gliding Range No. 7-78m and glide across the canyon. Make sure to use the air vents to keep your Chocobo Mount flying. After you land on the other side, head straight up the rock-made stairs and travel north until you reach a set of wooden stairs. At the top of the stairs, hook a right to find Gliding Range No. 13-88m.
Gliding Range No. 13-88m
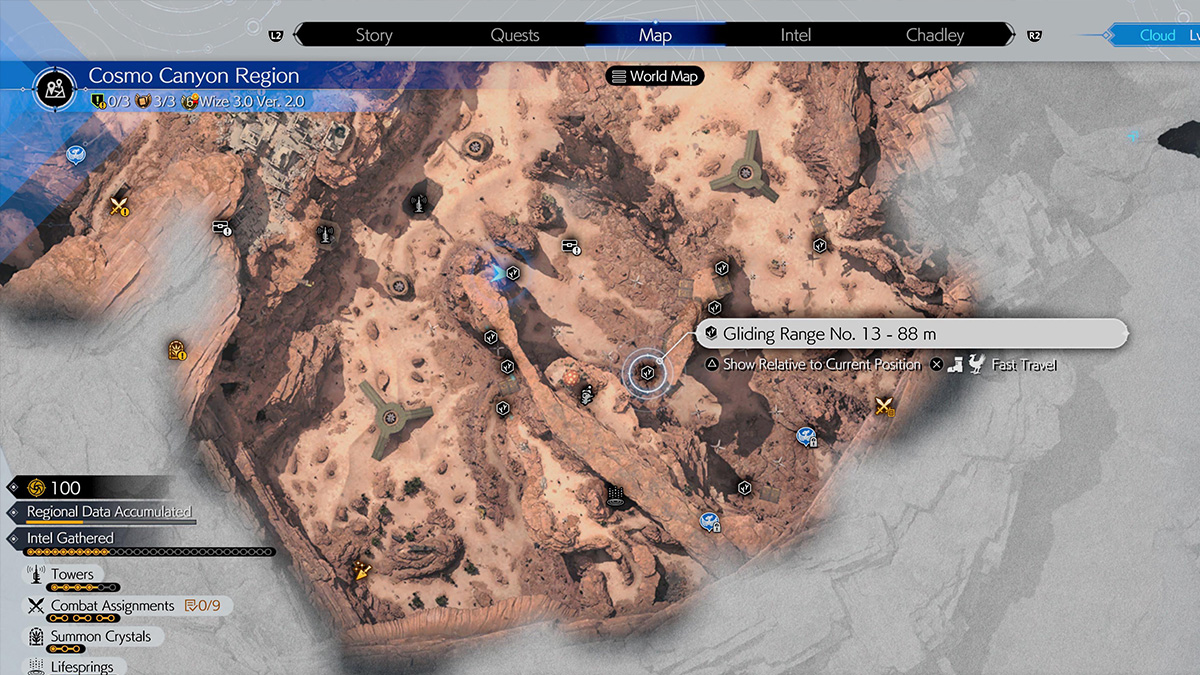
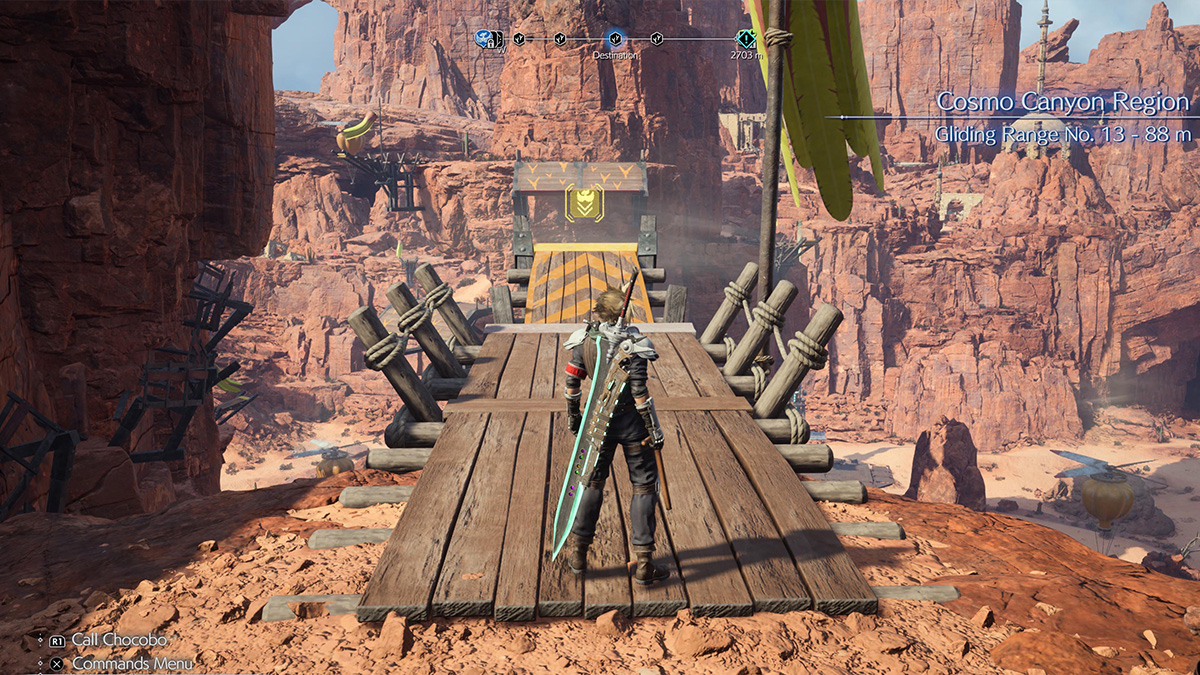
At Gliding Range No. 13-88m, have your Chocobo glide across the gap and use the air vents to keep its momentum going. As soon as you land, take an immediate left and take the wooden ramp, which is Gliding Range 14-90m.
Gliding Range No. 14-90m
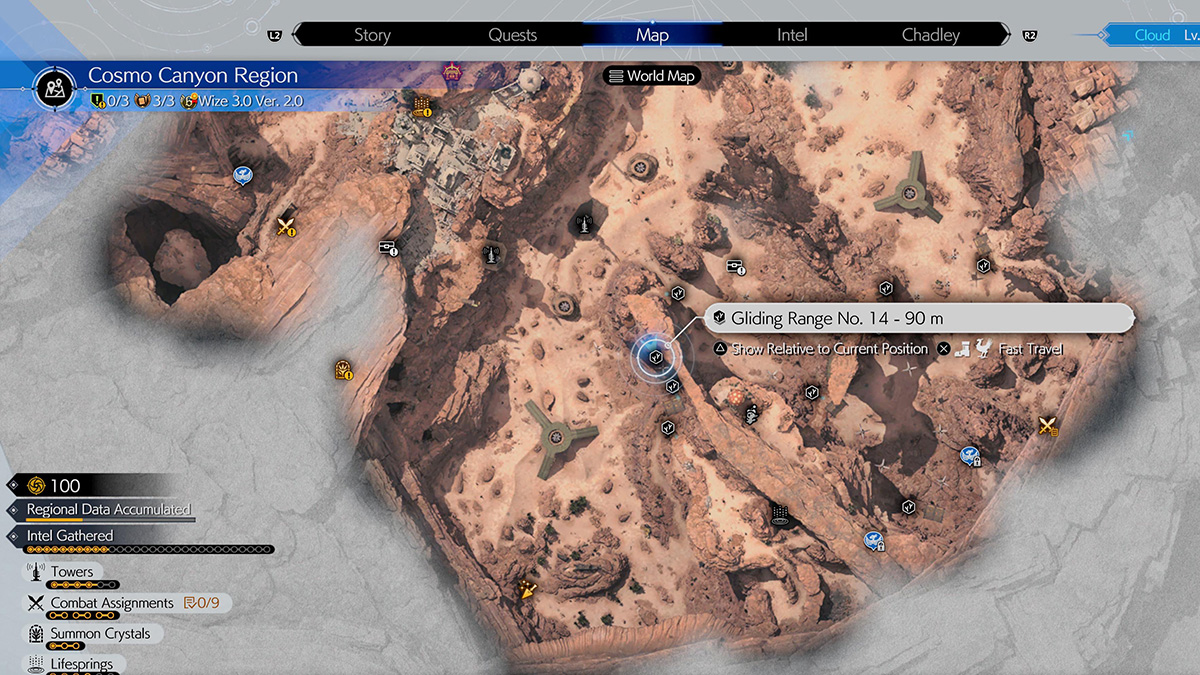
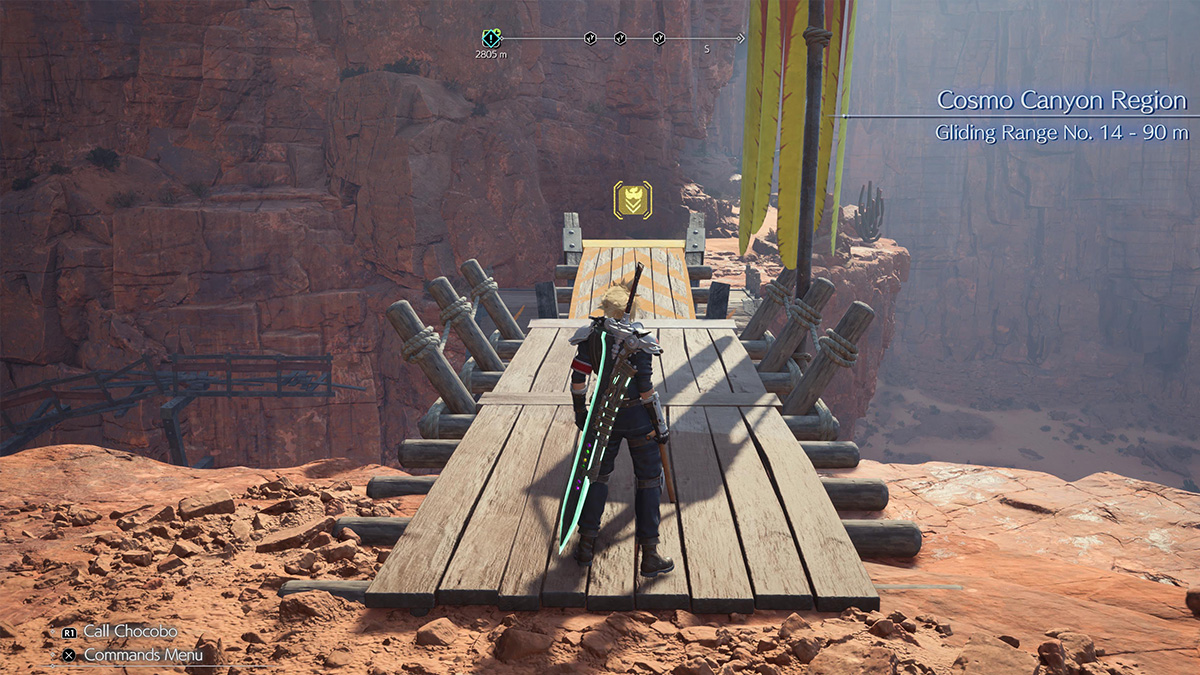
This is the shortest jump out of the entire quest, so it should be easy to hit. Use your Chocobo and run up Gliding Range No. 14-90m and hop across the small gap. You should now be on the mountain, which also has the Moogle Emporium.
Gliding Range No. 16-124m
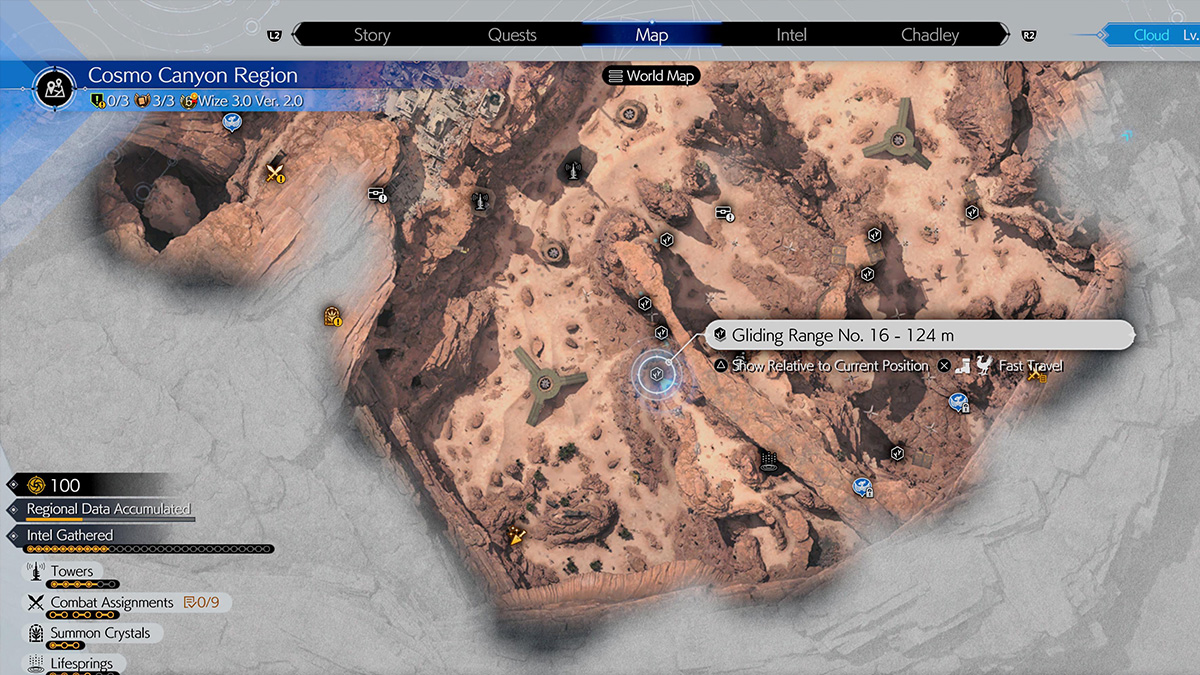
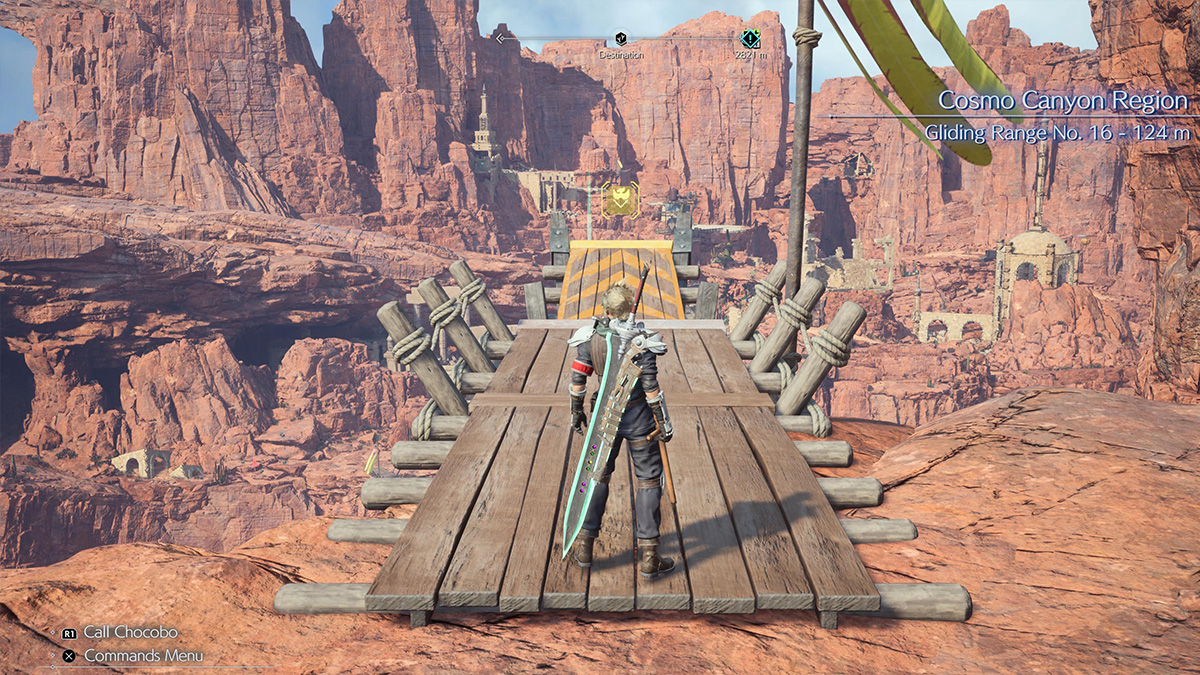
Finally, head up the mountain and take the windy path that wraps around until you reach the top. Eventually, you will find Gliding Range No. 16-124. This is the final ramp that you need to take. The gliding range will shoot you across the entire Cosmo Canyon. Use the air vents throughout the map to push you across to Activation Intel 6: Ancient Capital Tower.
Activation Intel 6: Ancient Capital Tower
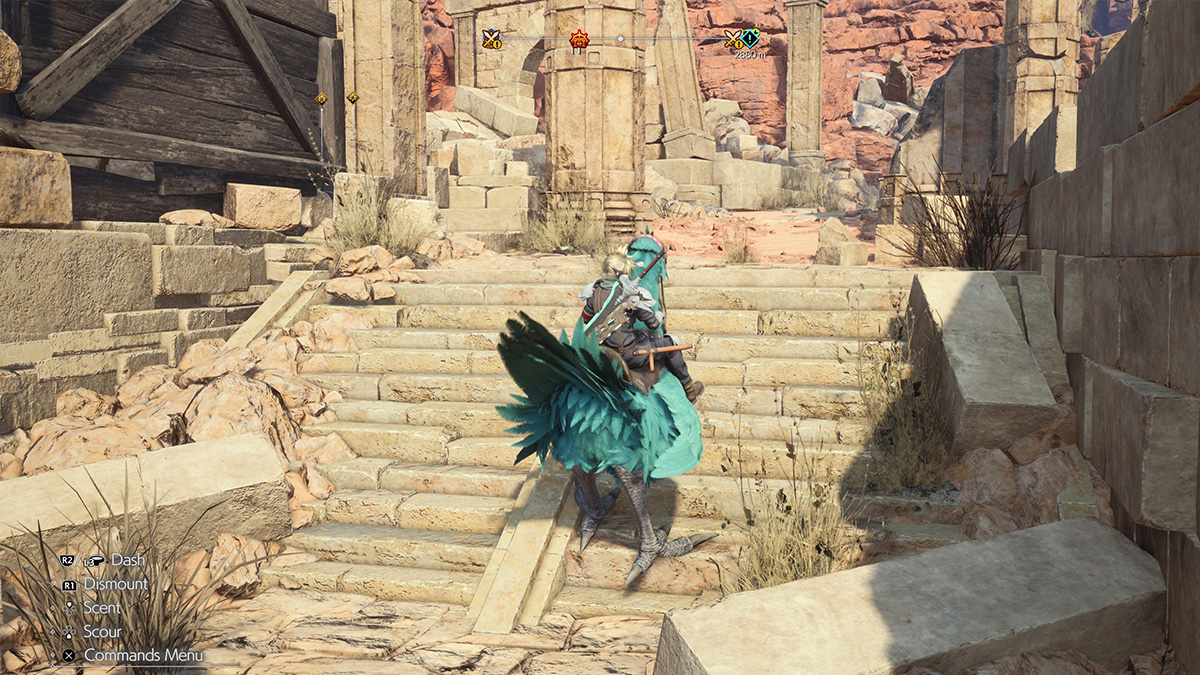
Finding the photo spot is fairly easy once you have access to Activation Intel 6: Ancient Capital Tower. Fly past the tower and head into the ancient ruins. After you go up the stairs, make a right and keep heading north until you exit the ruins. Keep following the Celestial Phenomena marker until you reach a giant rock you can climb with your mount.
You should see a fan hidden at the end of the rocky platform, which will send your Chocobo flying to the Celestial Phenomena plateau. Like the previous sections, you must take out a Reapertail before the Celestial Phenomena will appear in the sky. While this is another tough fight, this is the final one.

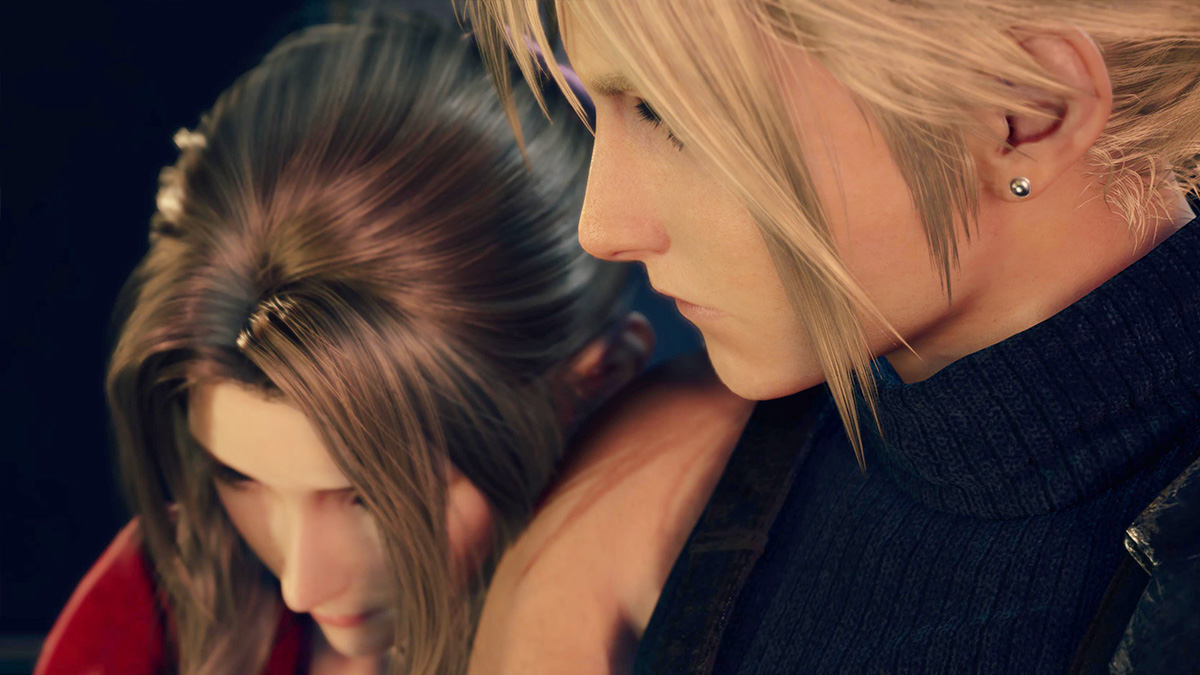
After the fight, a cute scene will trigger where Aerith will ask Cloud for a selfie. Once this is over, press “Up” on your D-Pad to get your camera out. For this photo, you will need to aim the camera lens in the middle of the two mountain peaks. Adjust your zoom until it’s at least 80% and green. Once you have the right angle, press “R2” to snap the picture.
Now that you have photographed the three Celestial Phenomena, it’s time to head back to the Planetology Assembly. Speak to the two Planetologists and give them the photos. Below is the list of rewards you get for completing the FF7 Rebirth Absence of a Sign quest:
- Deck of Tarot Cards.
- 10 Party EXP.
- 1,600 EXP (for each character).
- Your relationship with Aerith has changed (positive bond points).
The Absence of a Sign quest is pretty important as it can help you Romance Aerith in FF7 Rebirth. If you make it to Chapter 12 and don’t have enough points to score a Gold Saucer date with Aerith, completing this quest can tip that in your favor. Just make sure you don’t complete any other side quests.
Final Fantasy VII Rebirth is now available on PlayStation 5.